Form editor
No two businesses are the same. In order for your QMS to fully align with your processes and operation, it needs to be flexible.
The AlisQI form editor enables you to create forms to reflect your processes.
If you are new to data modeling, read this elementary introduction to data modeling in AlisQI first.
In this article
One minute demo
Let's start this article with a short demo of how the form editor works.
Field types
There are five different field types you can choose from:
- Date
Date or date-time fields - Text
Single line or large text area inputs - Numeric
Either integer, decimal numbers, or scientific notation (3*10e3) - Selection list
Drop-down lists or a group of radio buttons with predefined options - Checkbox
Boolean values - eSignature
Compliant electronic signature with identity validation
In most cases, a selection list with yes/no options is preferred over a checkbox, as they are more explicit. An empty checkbox can either represent “no” or “no value inputted yet”.
Calculations
For every field type, there is a calculated sibling. The calculated fields derive their value from the expression. Direct data is not possible for calculated fields.
Expressions can be anything from simple math, using built-in functions, or advanced expressions.
Rounding
Numeric values are rounded according to the specified number of decimal places. The rounding follows the “round half away from zero” method: values are rounded to the nearest integer, and if the fractional part is exactly 0.5, the number rounds to the integer with the greater absolute value.
Default values
Numeric field types
When a field has a default value, as assigned via the form editor, that default value is used in calculations that use that field as an input variable when no explicit value is entered.
Example
Imagine a pH field with a default value of 7. All calculations that refer to the pH value, will use 7 when no explicit pH value is inputted. If there is an explicit pH value, they use that.
Selection list field types
Default value
You can set a default value for selection lists. This default value will be preselected when manually inputting a new result.

Appearance
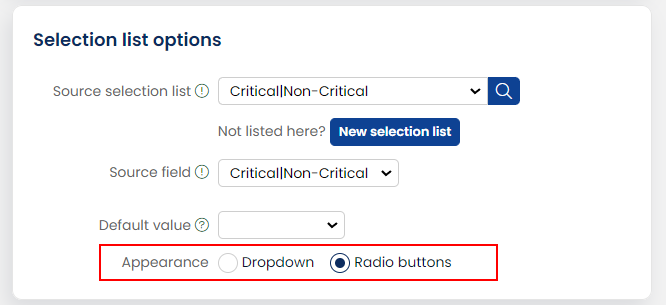
Selection lists can either be presented as dropdowns or as a group of radio buttons.
Filter
If the source selection list includes multiple columns with grouped or classified information, you have the option to set a filter condition. This helps narrow down the choices available in the selection list.
The image below displays a list of products organized into different product families. This categorization helps to filter and display only products belonging to families 1 and 2, streamlining the selection process for users who can now choose from the specific and relevant product groups.

Lists with more than 10 options will automatically fall back to a dropdown field with search capabilities. Lists with no more that 10 options can be displayed as a group of radio buttons.
Required fields
When fields are required, that data entry is mandatory.
Fields can only be set as required if there is a value for all historical results in the analysis set. Read here how to import or update results.
If you cannot set a field to be required, there are historical results that do not have a value for that field.
Managing forms
Groups

Add a new field
New fields can be added by clicking the + New field button.
On the page that appears next, you can define the name of the field and its properties.
Although there is no technical limit to the number of fields, more than 100 fields might reduce usability.
In general, we would advise keeping sets limited to around 50 fields maximum.
Copy fields
You can copy existing fields from other analysis sets by clicking the Copy field from another set button and selecting the field you wish to copy. After the field is copied, you can change it however you want. There is no (technical) relation between the fields. You're creating a true copy.
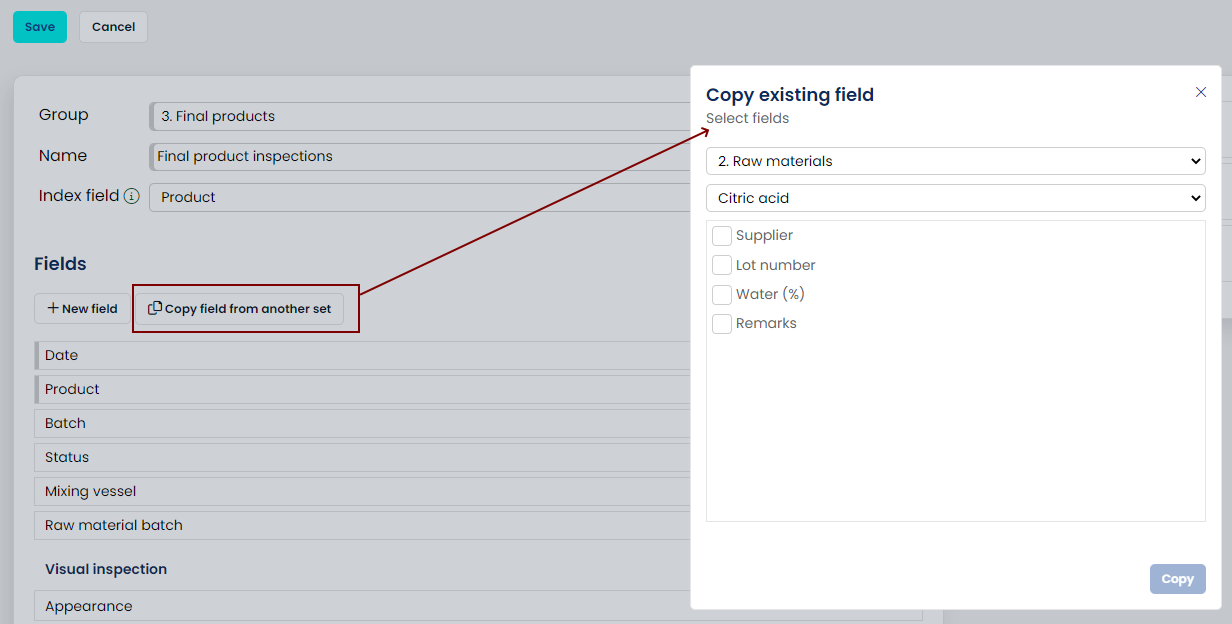
You can copy multiple fields at a time.
Rearrange field order
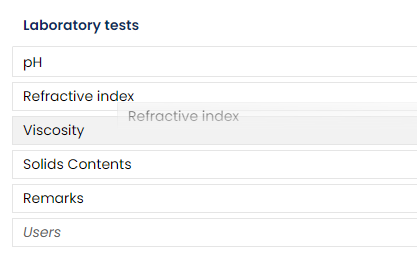
The order of the fields can be managed by dragging them into the fields list. The order of the fields is also the order of the columns in the Results overview.
Deactivate or delete fields
Fields can be deactivated or completely removed.
Deactivate fields by clicking the delete icon.
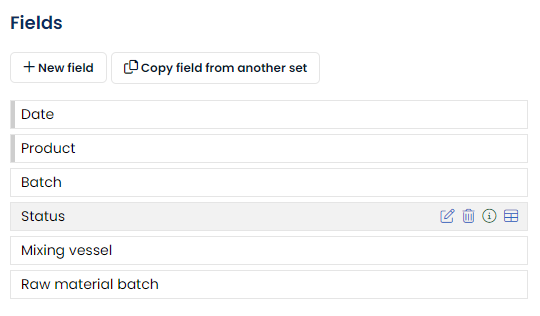
Inactive fields can be completely deleted by clicking the delete icon again.
By removing a field, all historical data will be lost. This cannot be undone.
Delimiters
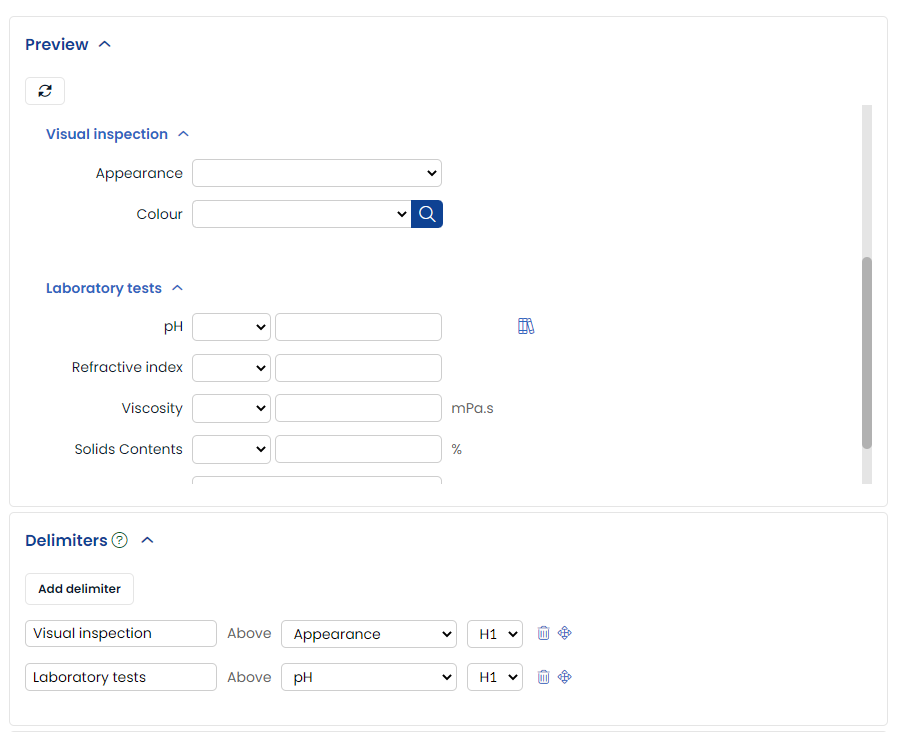
Delimiters are section headers in your form. Use them to make your forms more intuitive.
Add them from the Delimiter section on the forms management page.
Serial number
AlisQI supports auto-increment fields. These are typically used as a counter or result identification.
You can define any numeric/text field as auto-increment from the analysis set management page, in the Serial number section.
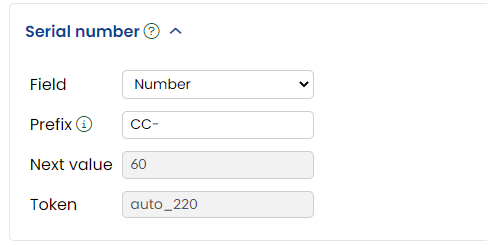 Select the field that should represent the automatic number, and optionally set prefix character(s).
The auto-increment will continue on the field's maximum value + 1. This results in 1 if the set is still empty at the moment you assign this auto-increment field.
Please note that while the serial number ensures unique values, it does not necessarily guarantee a sequential numbering order. This means that there may be gaps in the numeric sequence. When importing results using the import feature, if the system is unable to validate the data, these gaps may occur.
Index field
An index field can be seen as the Pivot-element of an analysis set - it's a required selection list that has a special meaning in AlisQI. For all options in an index field, you can assign individual specifications; and vary the field visibility.
Example
Imagine that you have a product group with various products. These products all have different specs, and for some of them, you want to test additional parameters.
You will then create an analysis set with all possible tests and add a product selection field. This product field is the pivot element, that determines the specs and tests to display.
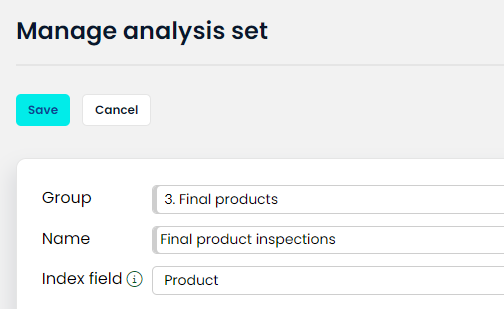
The product field will be the index field for this analysis set.
The index field is set here:
Status flow
Most of the quality management processes take a while to complete. For example, a lab sample might go through various workstations before a batch release verdict is issued. A customer complaint might travel from customer service to the quality team and back to the customer team. In order to have an immediate understanding of the states of individual cases and an insight into planning and workload AlisQI provides a visual state flow management.
Read here all about the status flow.
Lifecycle
Analysis sets and selection lists have a predefined lifecycle.
When creating a new form it is first saved as a draft. Only when a draft is published, it will be accessible from the production environment.
During their lifetime, they can be adjusted or extended. Adding new fields will first create a new draft version that needs to be published before the changes are committed to production.
When a set or list is no longer relevant, it can be deactivated or permanently deleted by clicking the trash can. The screenshot below shows how to deactivate

Selection lists can only be deleted if they are not attached and used in an active analysis set.
Inactive sets or selection lists can be restored, by clicking the reactivate icon from the Show inactive list.
By permanently deleting an analysis-set or selection list, all data is lost.
Draft publication

Field visibility
Many of our customers need to accommodate slight variations in their inspections per product. That is what the field visibility feature is all about.
Technically, for analysis sets with an index field, the visibility of fields can be managed for every option of the index field. This might sound rather abstract. Let’s illustrate with an example.
Imagine you created an analysis set for final product inspections, with a selection list with Products that you defined as the index field.
Now you can activate or deactivate the fields in your analysis set per product. This way you can implement variations to your inspection plan per product.
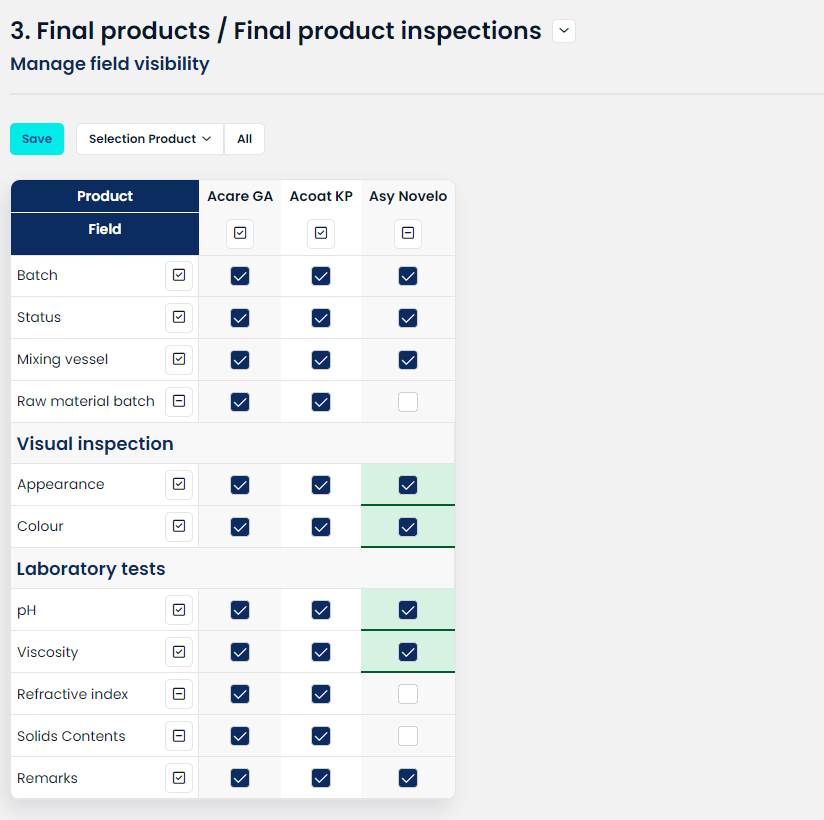
When inputting data, only the fields marked as visible will appear in the data entry form.
Be aware that the visibility of required fields cannot be changed. They default to visible.
Templates
Templates in AlisQI provide ready-to-use configurations for common quality management processes. They help you get started faster by combining best-practice setups with the flexibility of AlisQI’s no-code platform.
Each template includes preconfigured analysis sets, selection lists, set relations, and workflows — all of which can be tailored to your organization’s specific needs after deployment.
The catalog is continuously expanding, offering best-practice solutions for processes such as:
-
Customer complaints
-
Incoming goods inspections
-
Environmental incidents
-
Supplier onboarding
Where to Find Templates
You can access the Template Catalog directly from your AlisQI environment:
-
Go to Management
-
Click Templates in the Managmeent menu
-
Browse the available templates and review their descriptions.
- Click Request to Deploy.
Your request will be sent to the AlisQI support team. They will:
-
Verify if the selected template is included in your license, and
-
Confirm and execute the deployment in your environment.
Once the deployment is complete, the new analysis set(s) will appear in your workspace, fully editable and ready for use.
After Deployment
After deployment, templates behave just like any other analysis set. You can:
-
Modify fields, workflows, and relations
-
Add or adjust selection lists
-
Extend the configuration to fit your exact process
This ensures that even preconfigured templates remain fully customizable to your organization’s needs.